
Installing L5P CAN Plugs After Emissions Removal
Installing L5P CAN Plugs After Emissions Removal
The L5P CAN plugs are designed to preserve the CAN network functionality after removing emissions components from your vehicle. These plugs are fitted with fine terminals that align with the factory harness, requiring careful handling during installation to avoid damage.
⚠️ Critical Safety Precaution
Before installing or removing these CAN plugs, always disconnect the vehicle’s battery to avoid potential communication errors within the CAN network.
Installation Best Practices
To ensure proper installation, it’s essential to clean the contacts on your vehicle’s connectors. We suggest using Electrical Contact Cleaner and applying Dielectric Grease to prevent corrosion and ensure a secure connection.
For optimal results, install the CAN plugs before reconnecting the batteries. After flashing your SOTF tune, scan for error codes. This will help you identify any connection issues early while the emissions system is still in place, allowing it to clear any error codes.
Connection Preparation:
- Clean contacts with Electrical Contact Cleaner
- Apply Dielectric Grease
Detailed Installation Sequence
- Disconnect the Vehicle’s Battery: Before installing or removing any CAN plugs, disconnect the battery to prevent potential communication errors within the CAN network.
- Clean the Connector Contacts: Use Electrical Contact Cleaner and apply Dielectric Grease on the contacts to ensure a secure and corrosion-free connection.
- Install the CAN Plugs: Install the CAN plugs while the battery is still disconnected.
- Reconnect the Batteries: After installing the CAN plugs, reconnect the battery.
- Flash Your SOTF Tune: Once the battery is reconnected, flash your SOTF tune to update the vehicle’s system.
- Scan for Error Codes: Finally, scan for error codes while the emissions system is active to identify any connection issues early.
NOx Module Replacement
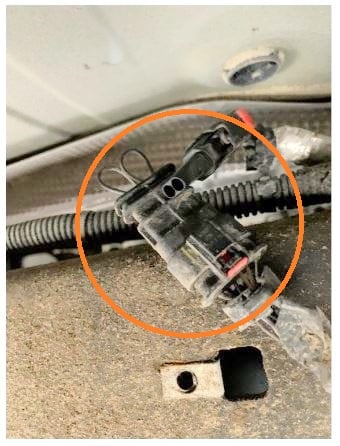
The black 6-pin plugs are used to replace the NOx modules that get disconnected when the factory exhaust system is removed. For vehicles from 2017 to 2019, three NOx plugs are required. For models built in 2020 or later, only two NOx plugs are needed.
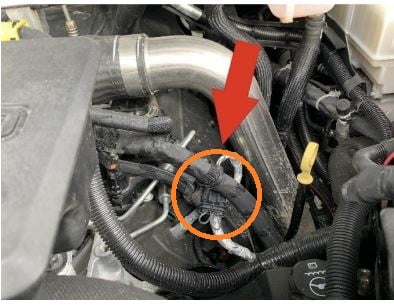
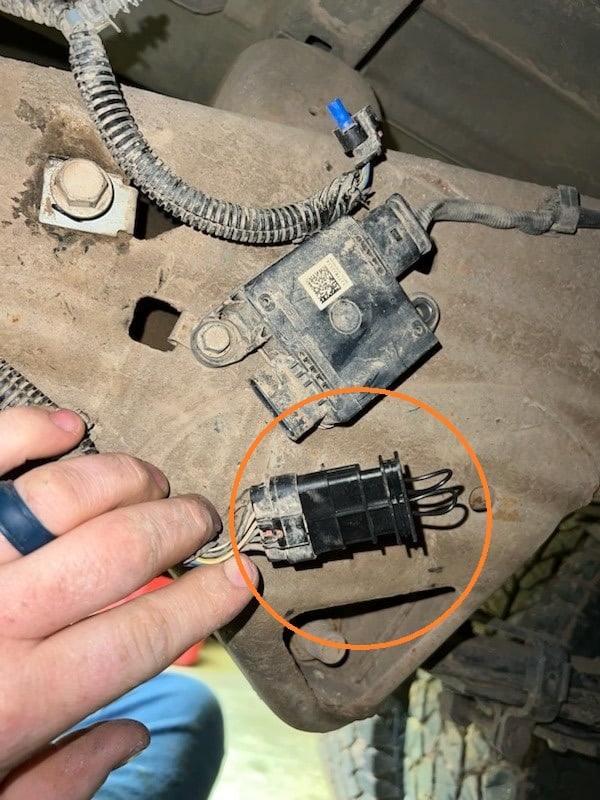
You will find the NOx modules during the exhaust removal process. If you’re unsure, trace the sensors from the exhaust to the module, which will look like this:

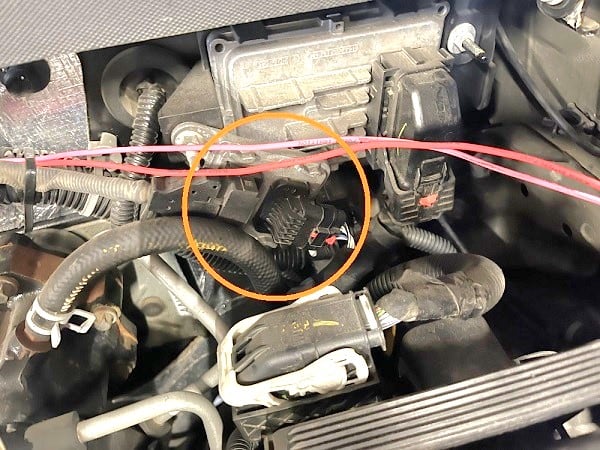
One of these modules can be found in the engine bay, typically near the driver-side corner of the firewall as shown below:
2017-2019 Models
2020+ Models
DEF Connector Specifications
For the DEF connector replacement, use the larger 16-pin plugs (for 2017-2019 models) or 30-pin plugs (for 2020+ models). These plugs help maintain the CAN line after the factory modules are removed, ensuring the network remains functional. These plugs can be swapped with the original modules if testing is necessary. While it’s fine to leave the DEF connector plugged in, be aware that leaving the NOx modules in place may result in sensor failure over time.
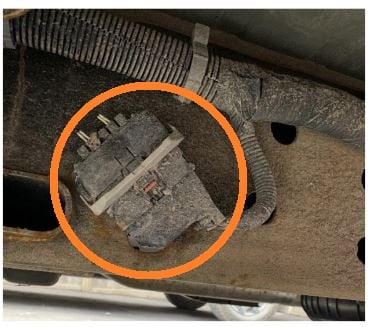
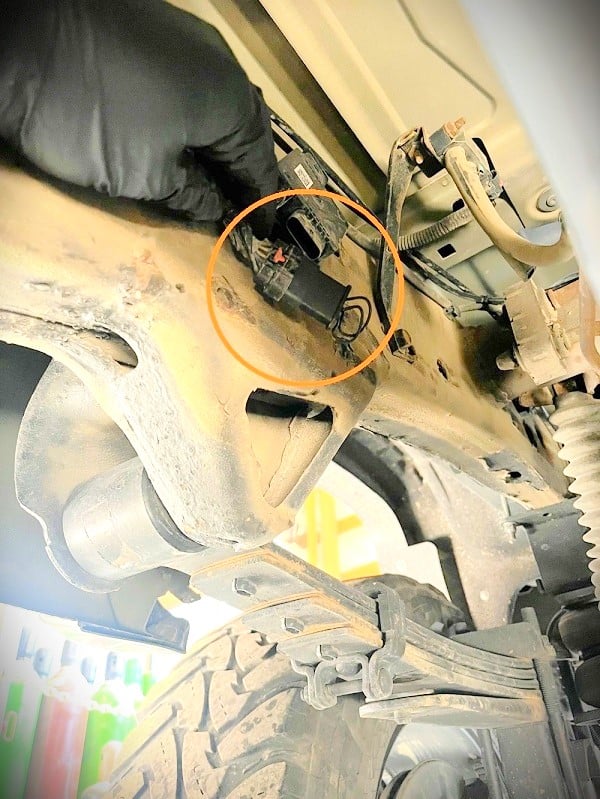
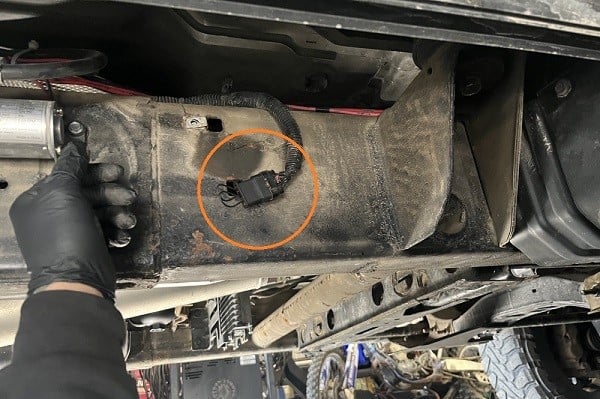
Other modules can be found underneath the vehicle. On the 2017-2019 models, the DEF connector is located on the passenger side frame rail. For 2020+ models, the DEF connector is on the driver-side frame rail:

2017-2019: 16-pin plugs
(Passenger side frame rail)
2020+: 30-pin plugs
(Driver-side frame rail)
Module Identification Gallery
⚠️ Long-Term Maintenance Notes
- DEF connectors can remain installed permanently
- Retained NOx modules may experience sensor degradation
- Original modules can be reinstalled for diagnostic testing